During the initial build we briefly considered installing a diesel heater, but decided not to since they are expensive and we didn't think of it as a high priority item at that time. We went for a cheap portable gas heater instead and that worked fine until the temperature dropped below zero in Norway. The gas canisters loose pressure in very cold environments, resulting in a heater that won't ignite. After having slept several nights in the car where we woke up to a completely frozen interior, we realised a proper heating system was not some luxury item but a bare necessity if we wanted to continue to travel in this environment.
So we started doing some quick research to find out what would be the best system and how we could realise it. A diesel air heater turned out to be the absolute best system for our vehicle, but the prices of the often used Webasto or Eberspächer kits were still way out of budget unfortunately. So we looked at other cheaper options, but they just didn't feel right. When scrolling through adverts of used Webasto units again, there was one that caught my attention. It was about a brand new "Chinese" unit which looked like an exact copy of the high-end units. We were very sceptical at first, because they we're something like 10-20% of the cost of a Webasto kit. This couldn't be right, could it? But we just had to know for sure if they were any good before we would turn away from them, so we spend some more time reading. It was amazing to see the amount of information that was out on Youtube, Facebook etc. on these Chinese diesel heaters. Reviews, install guides, tests, everything was out there and there were thousands of people using them and installing them in their campers. So after going through many videos and blogs, we were actually convinced that they were safe and of good quality. And for the price of around €100,- we figured it was worth a shot!
As we were in need for a kit as soon as possible, we searched for a trusted supplier that had a warehouse in Europe. The kit arrived within a week and included almost everything that was needed for the install. As we took everything out of the box, we were quite surprised by the quality. The unit looked pretty durable and everything was in good shape. Except for the manual, which was very unclear. Fortunately, their was a lot of help to be found online.
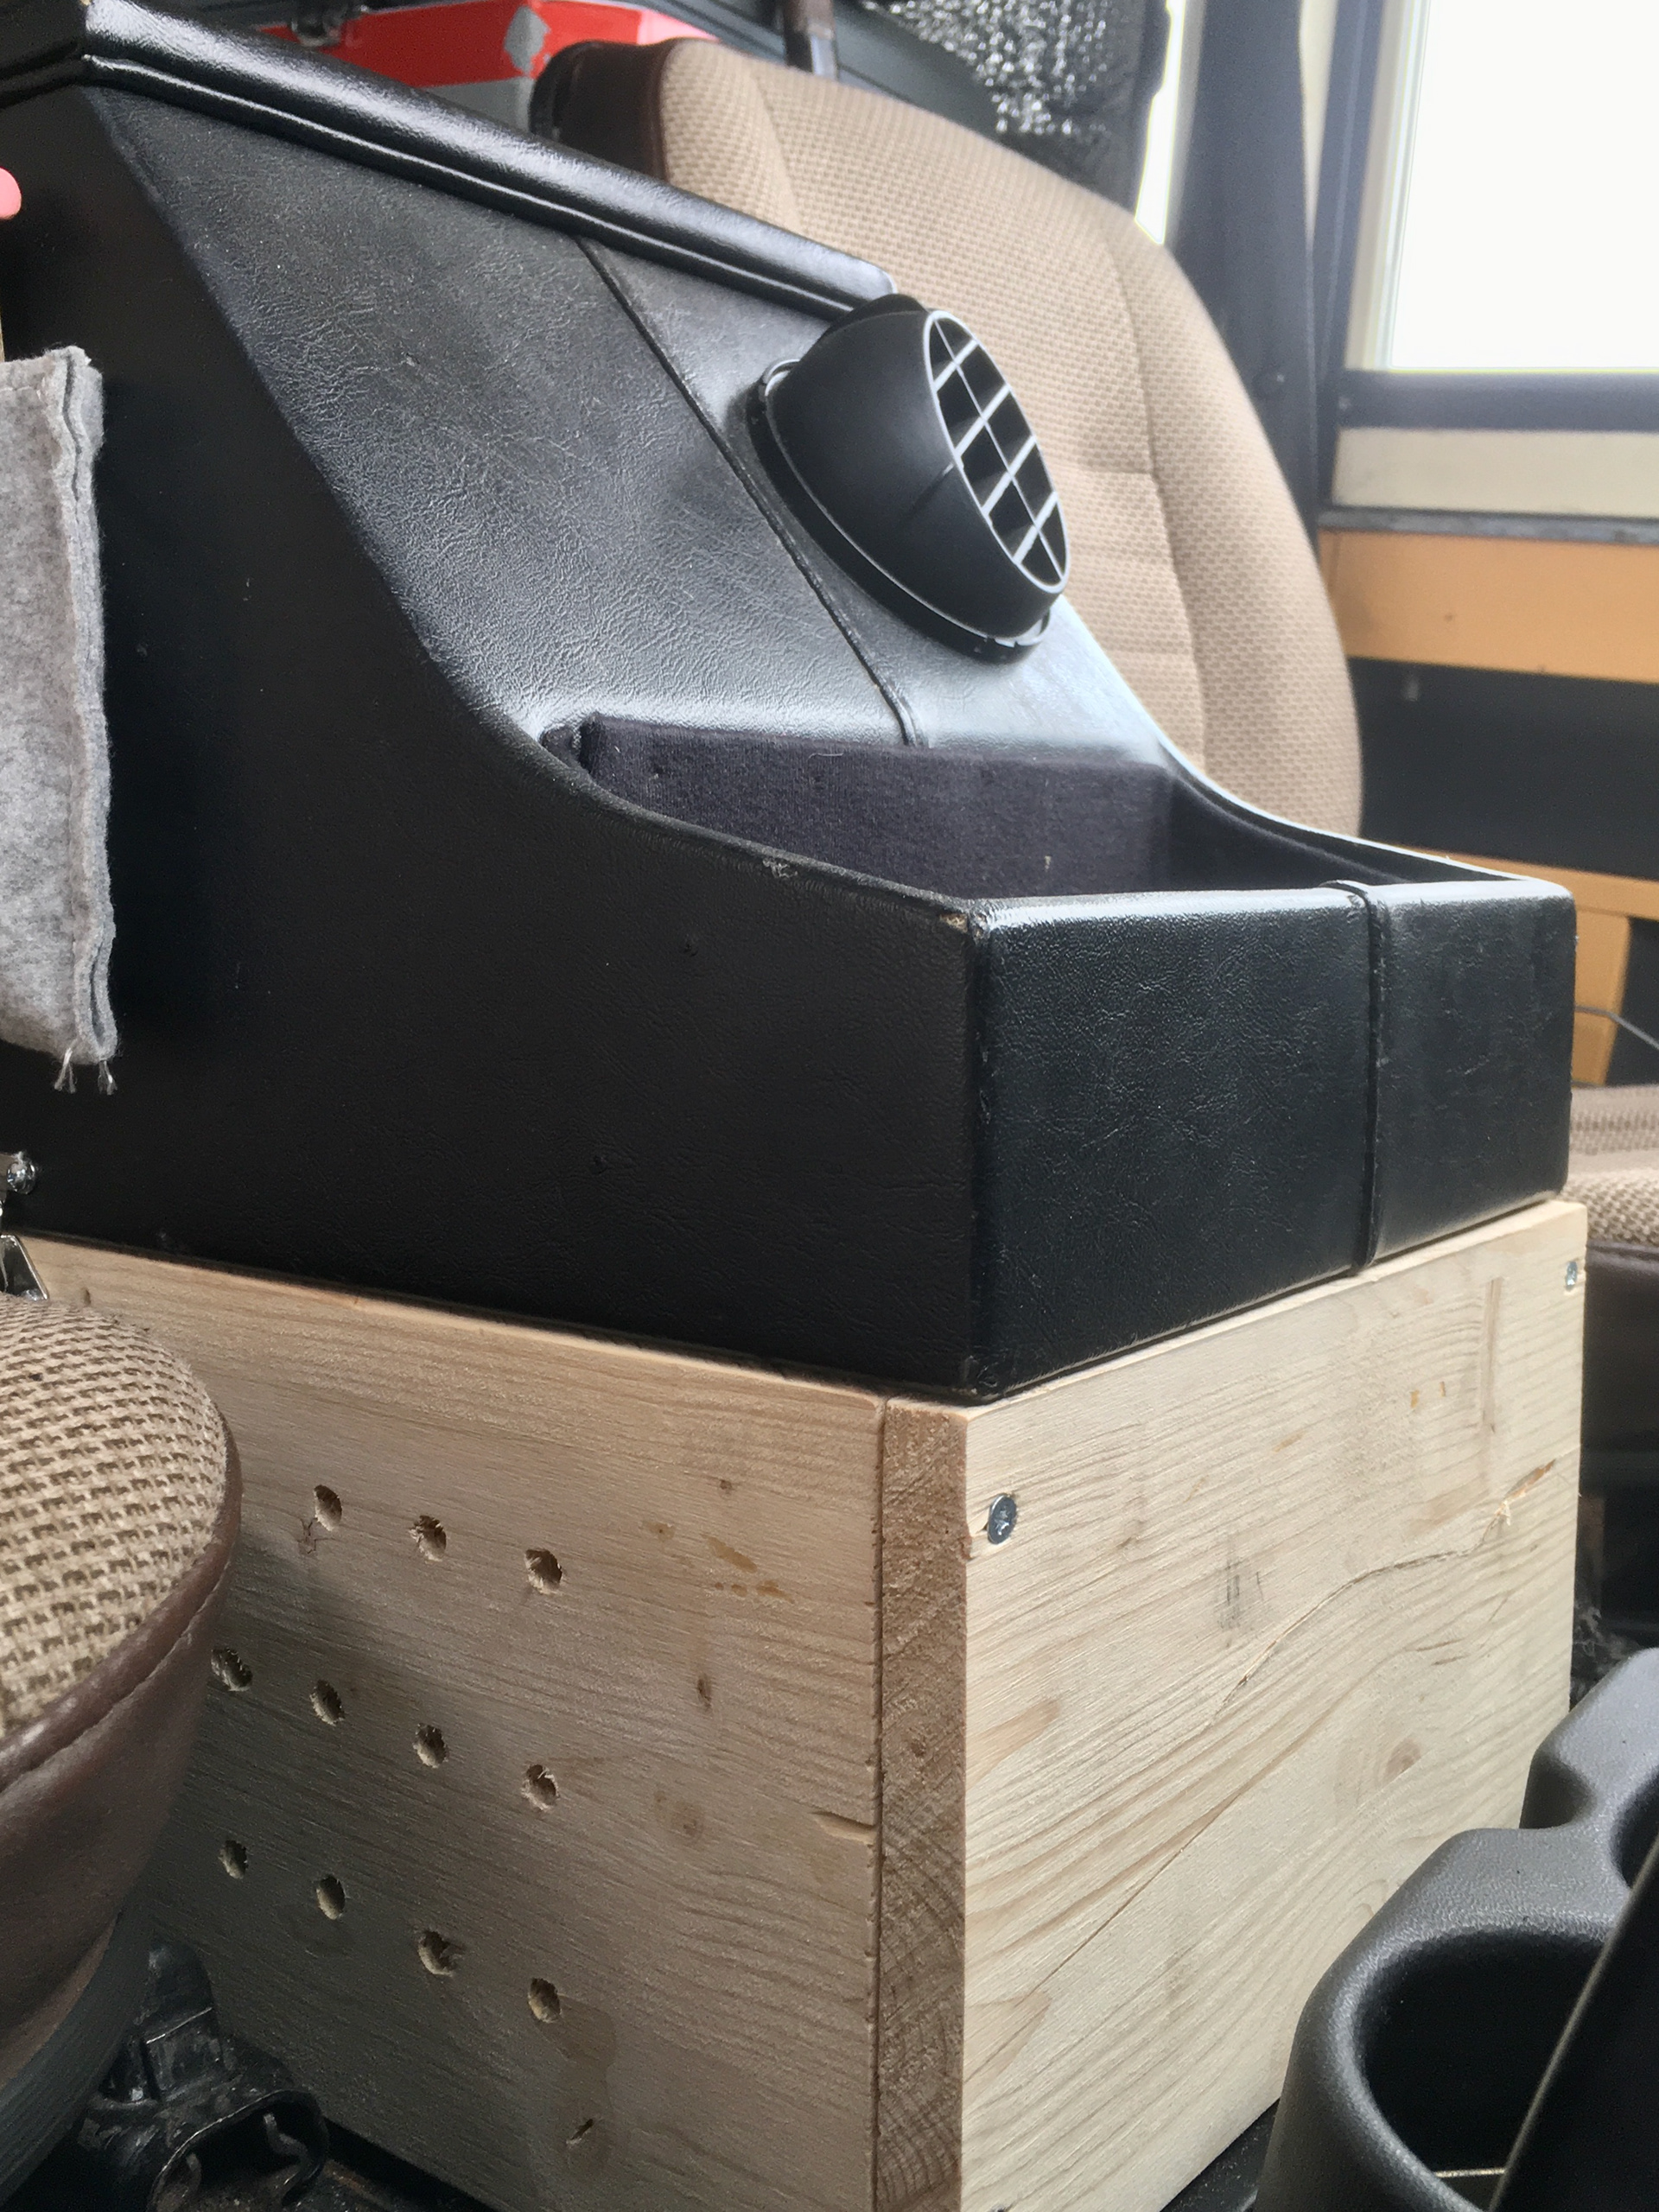
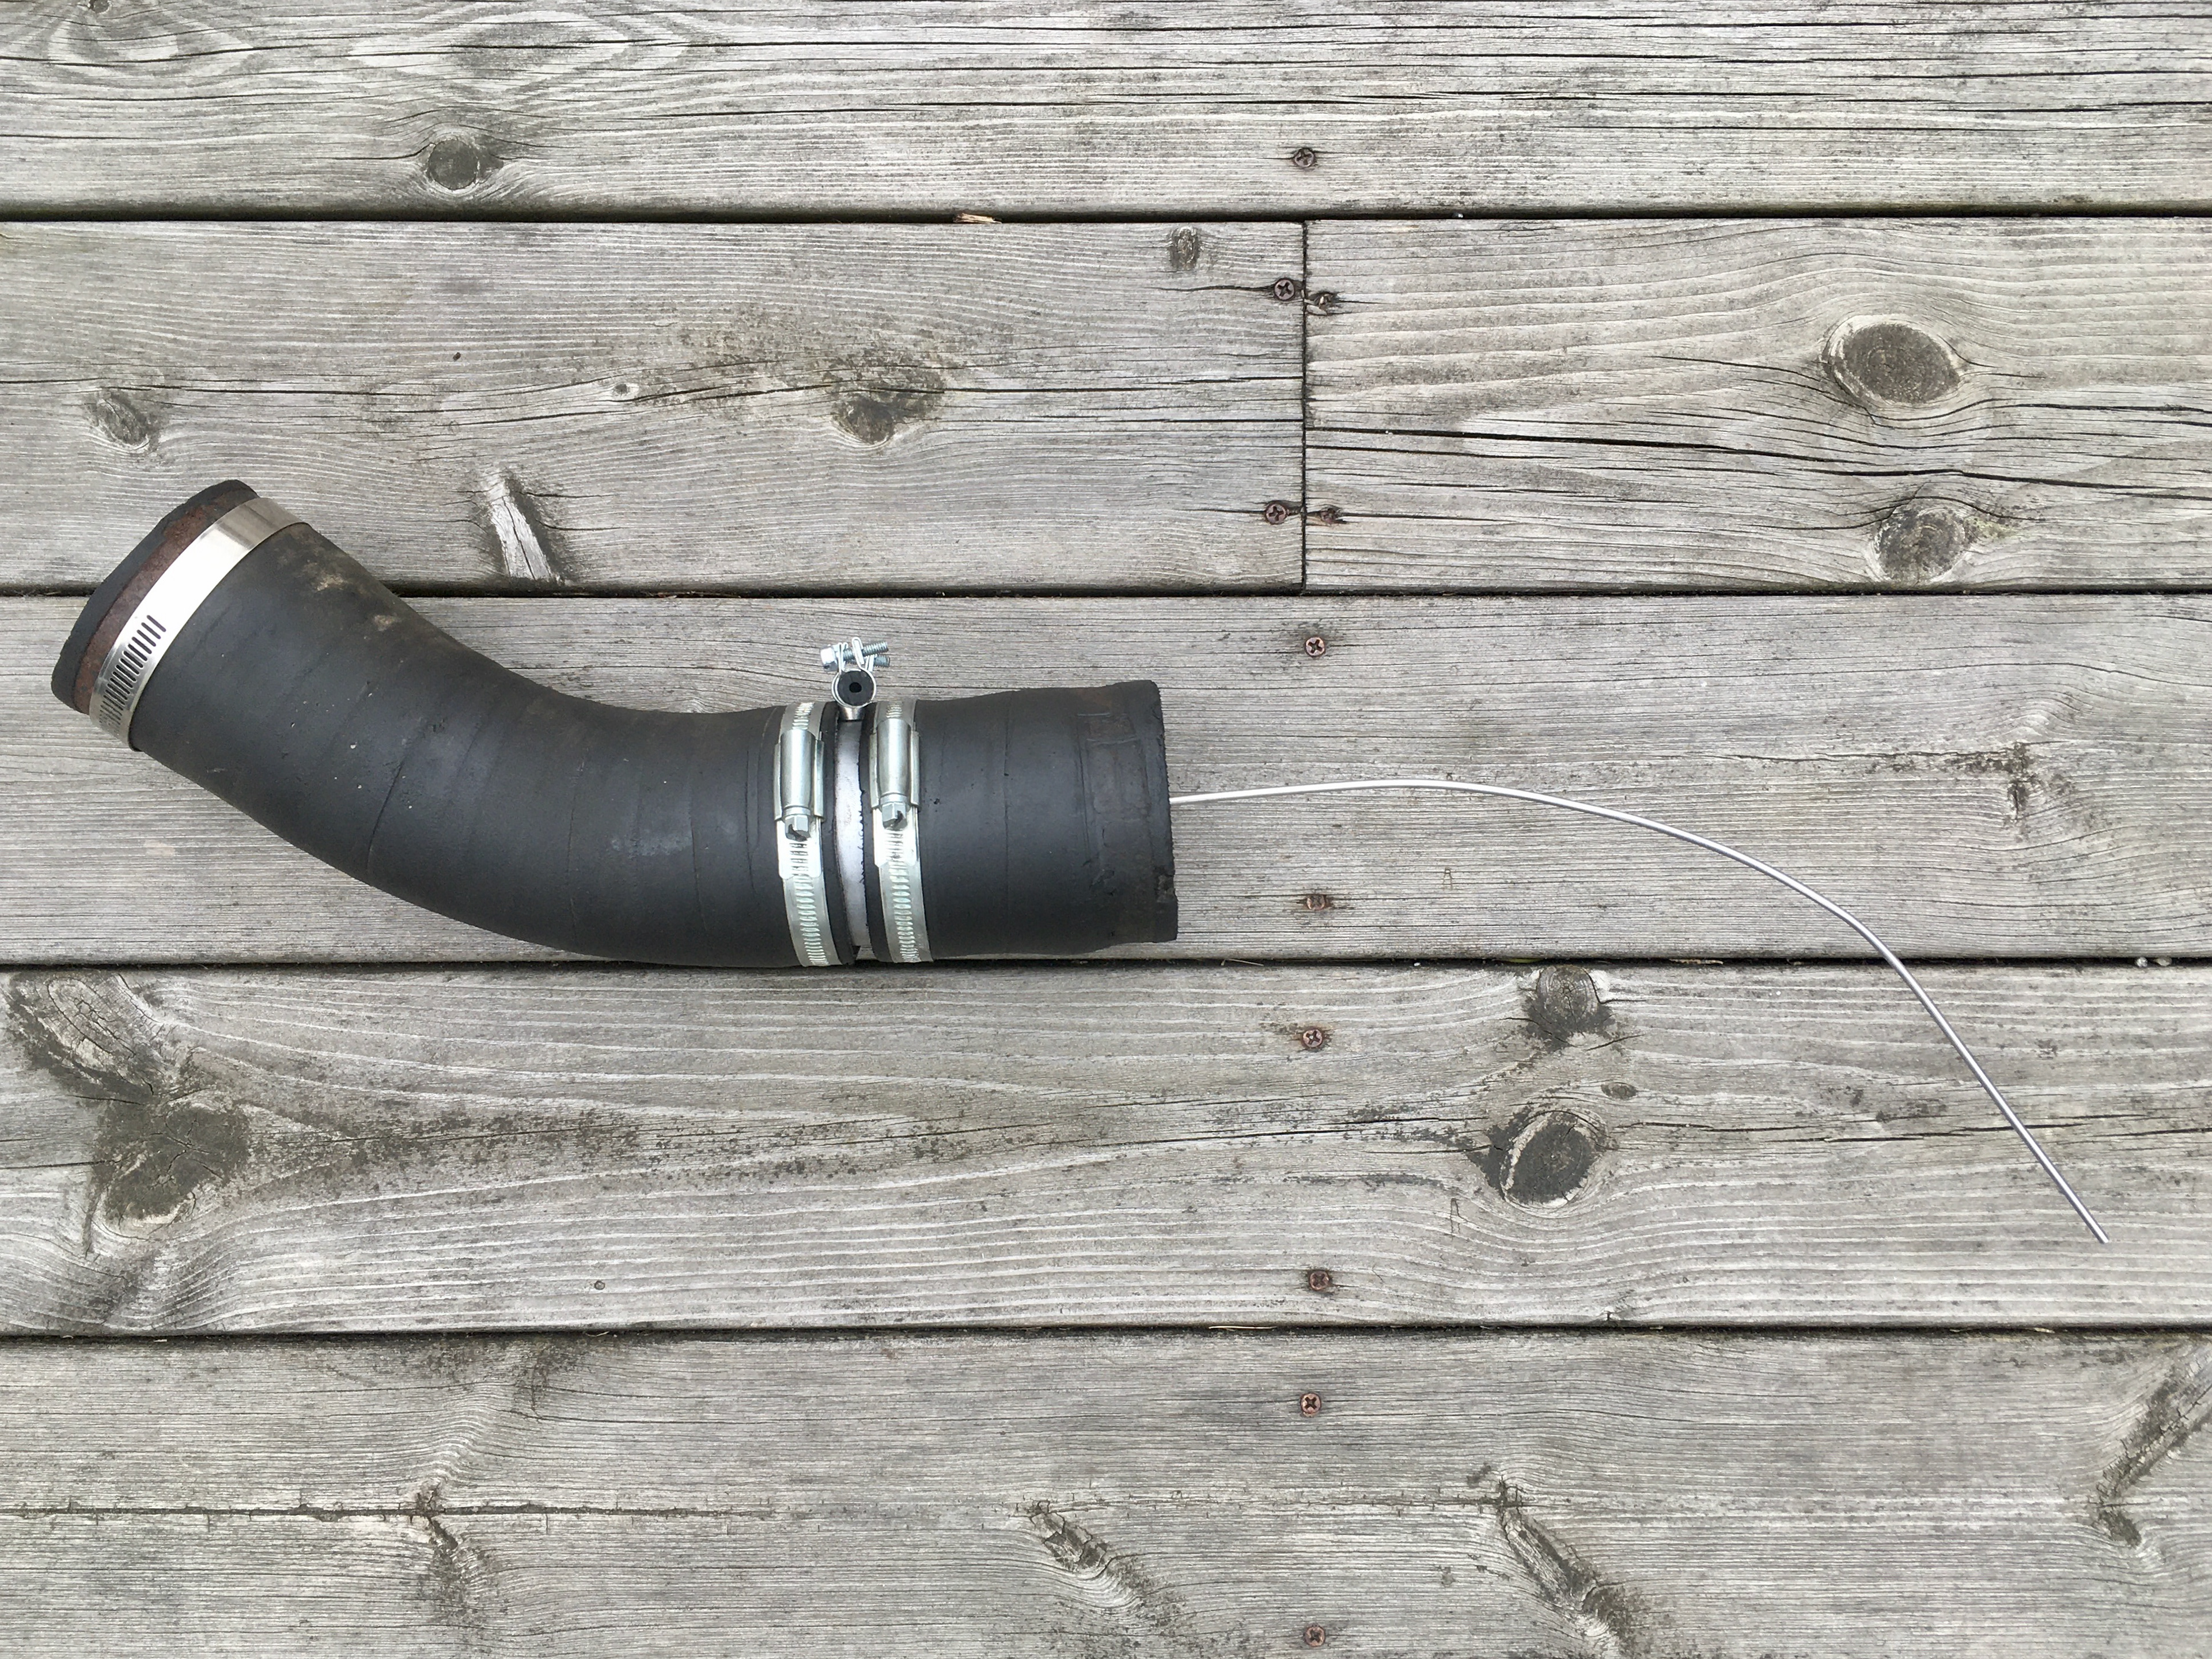
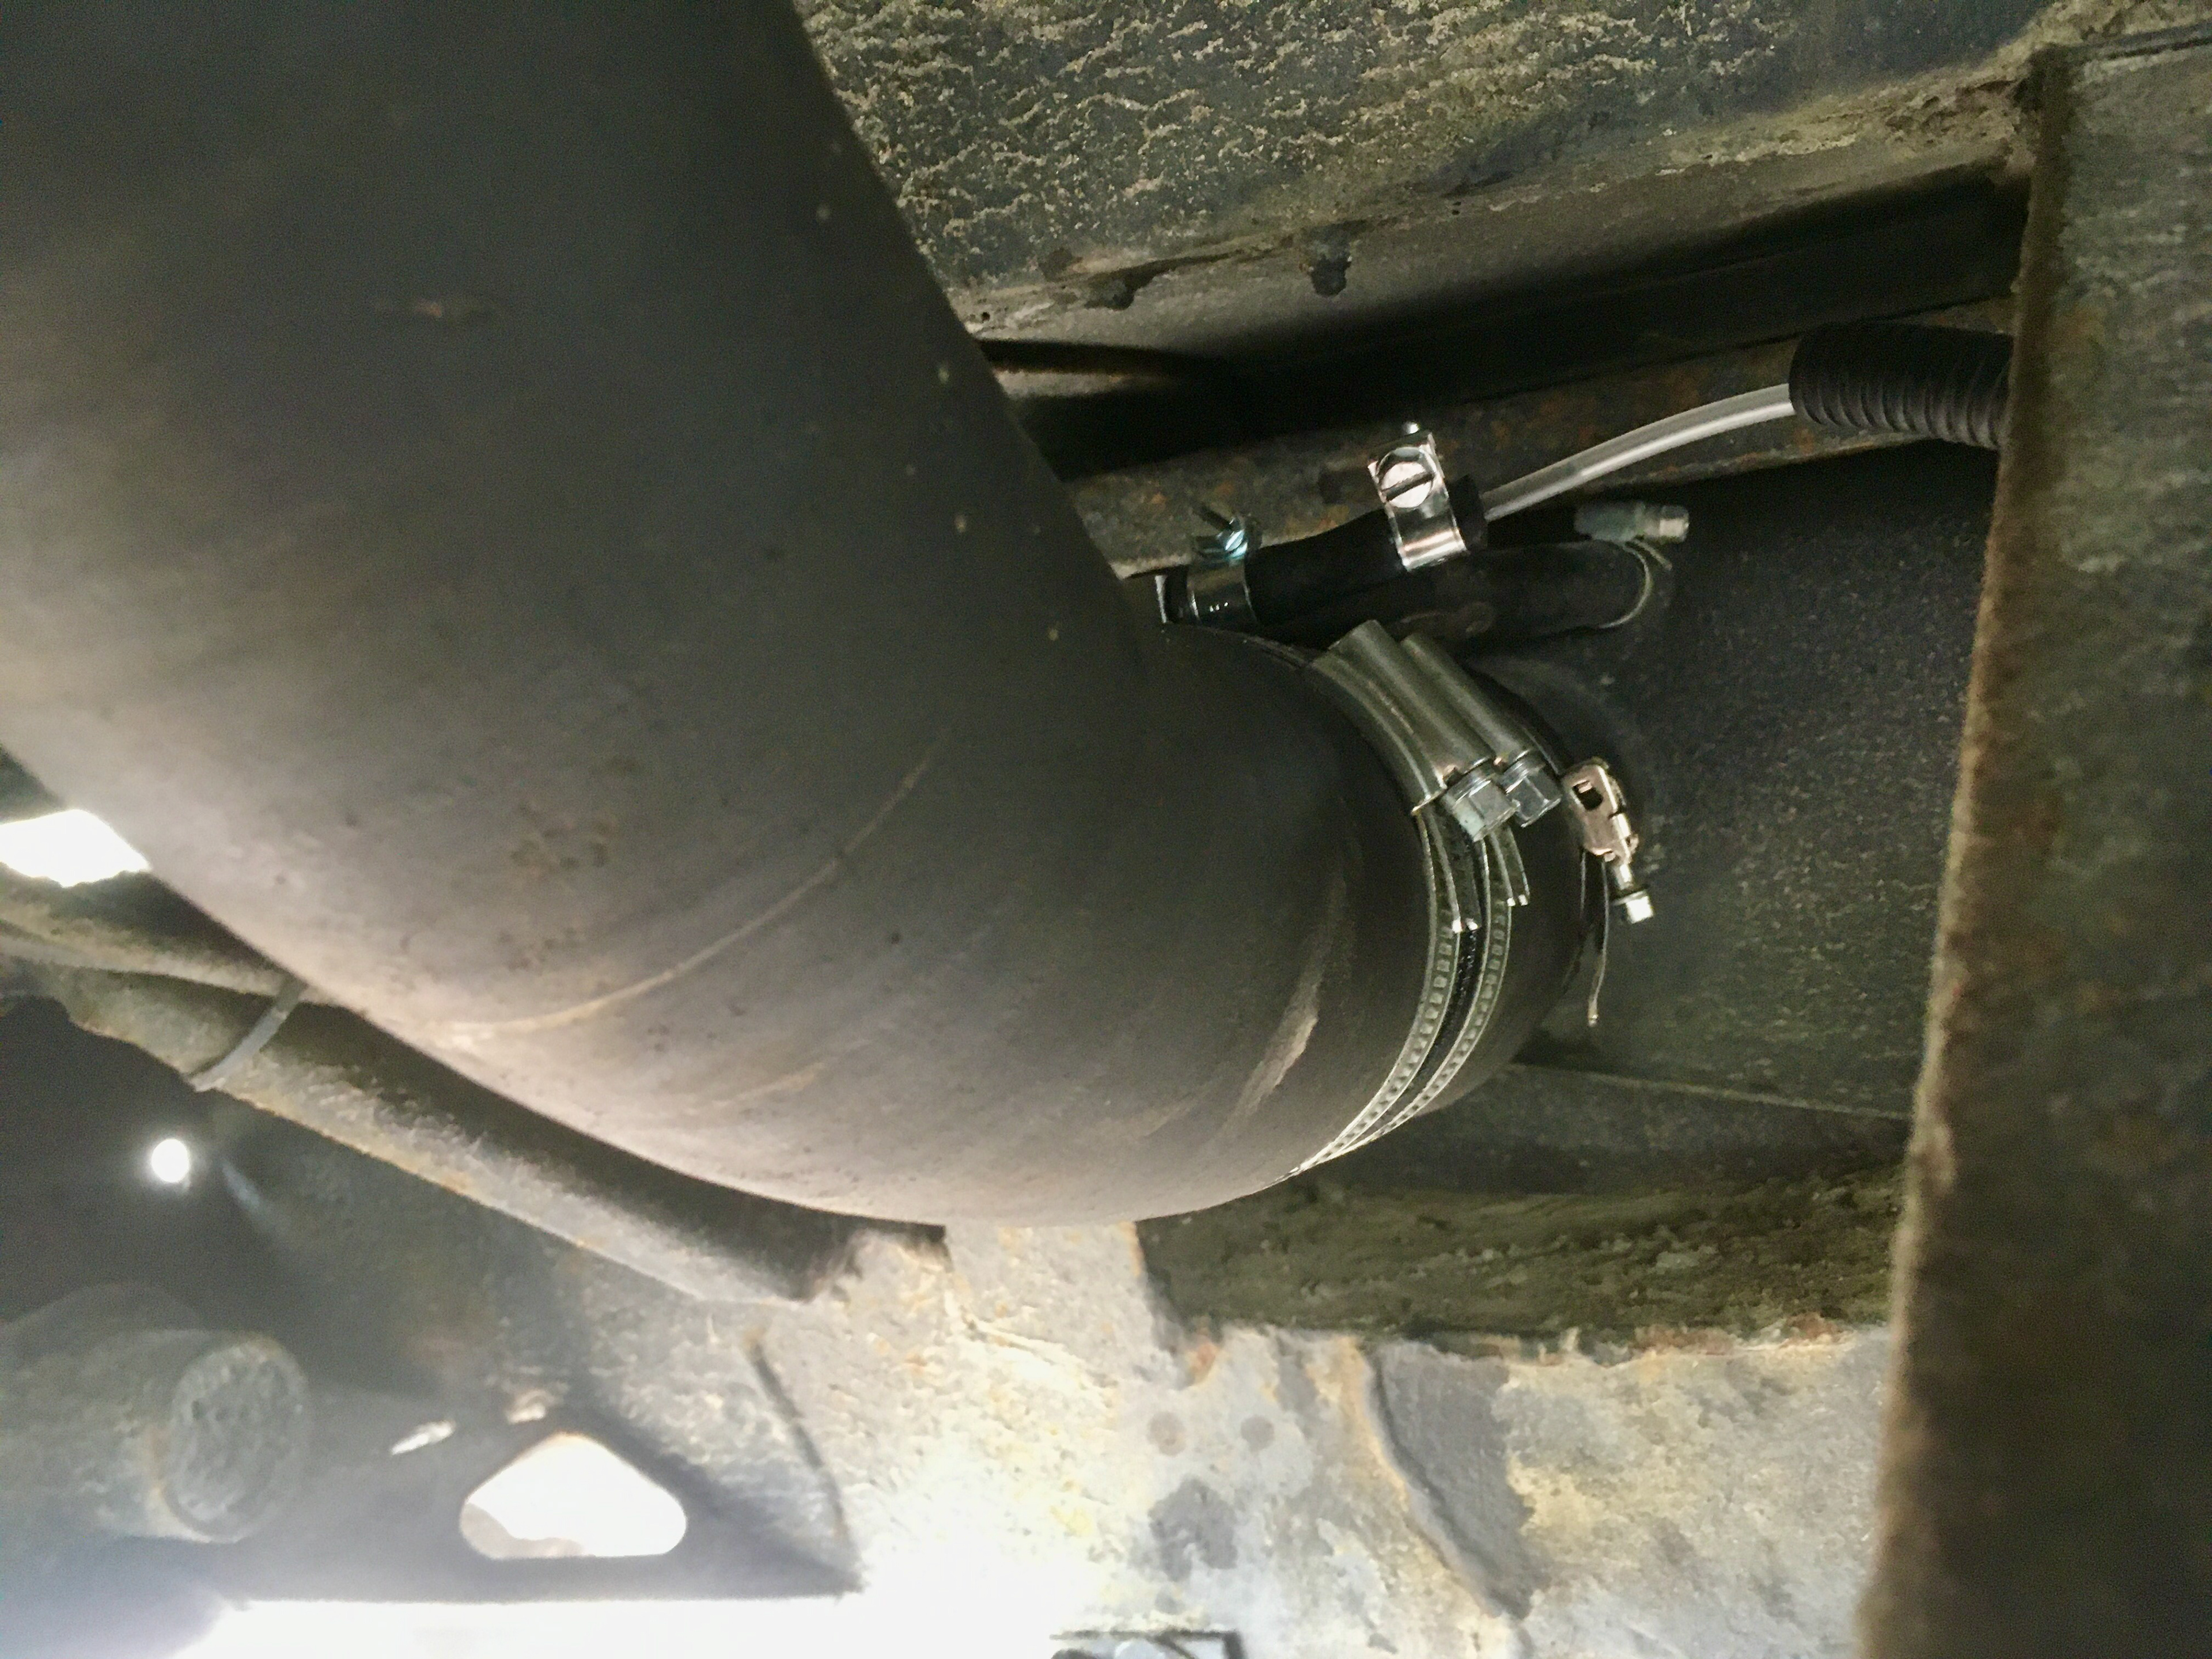
Circumstances were far from ideal for a nice day of work on the car, we were on a parking lot and it was around 5°C below zero. But in the end we managed to have the system running within a couple of hours. We decided to place the heater under the cubby-box. It was one of the easiest places to install it and, aside from raising the cubby-box a little bit, didn't require any major changes to our interior. By placing it here, we would also be able to heat up the cabin while driving, a big advantage considering the 110's own heating system isn't something you'd call very powerful. The exhaust and air-intake where easy to route underneath the car, over the gearbox and could be fixed to the chassis. The electrical power would be coming directly from the additional battery chained to our Yeti power station charged by the solar panels. We added a switch in the main supply wire, so the whole heating system and LCD control unit could be turned off completely when needed.
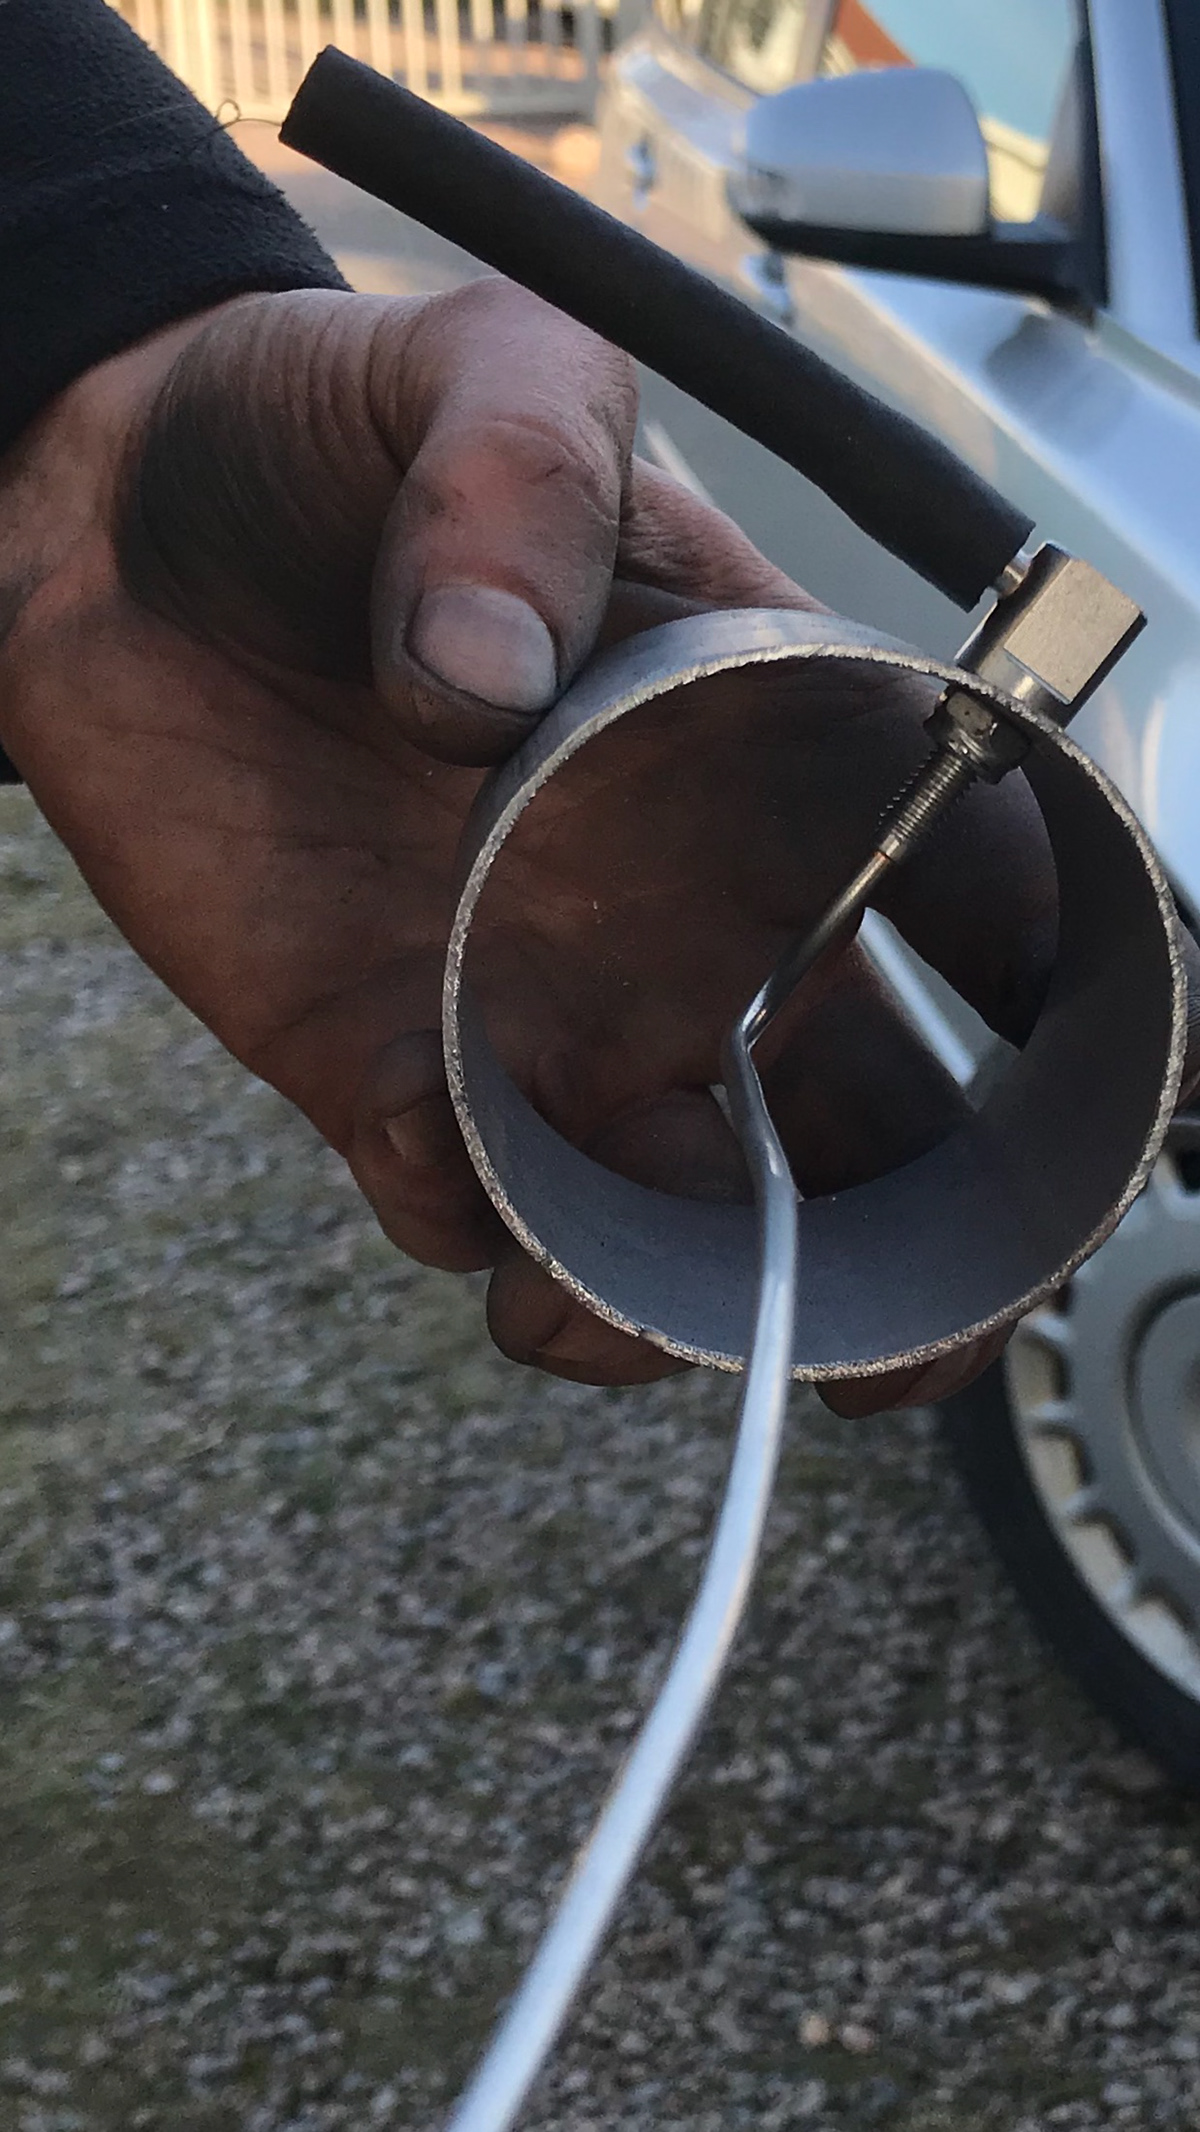
The biggest challenge was to come up with a solution for the diesel supply towards the heater. Preferably, we didn't want to use the 15L fuel tank that came with the kit as this would take up a lot of valuable space and be quite a hassle to refuel. So we looked into other ways, like mounting a smaller tank somewhere underneath the car or connecting it to the car's fuel system. Most commonly used solutions for connecting it to existing fuel systems are either fitting an additional standpipe to the tank or adding a T-piece in the fuel line. But we found another solution on this website that din't require dropping the tank to add a stand pipe or risking to mess up the engine's fuel supply by fitting a T-piece. This smart solution added a fuel pick up point to the fuel filler tube, but unfortunately it wasn't available in the right diameter to fit our car. So we had to make it ourselves, which in the end was a lot cheaper too. It is very easy to realise by just finding a right sized piece of metal tube and attaching a filler pipe to it, which are widely available online for those specific diesel heaters. By bending the small filler pipe so that it sits slightly higher than the bottom of the tank eliminates the risk of running it completely empty with the heater in use. The fuel pump was mounted as closely as possible to the filler tube. By mounting it inside a sealed junction box it was protected against mud and water and also reduced the noise of the pump. By fitting pieces of rubber between the box and the chassis the vibrations caused by the pulsing of the pump were reduced even further.
After having used it for a while now, the heater is still functioning very well. The car is nice and warm in no time and it works very well against condensation as well. We installed a CO-alarm to be absolutely sure we're safe and always open a window when using the heater.
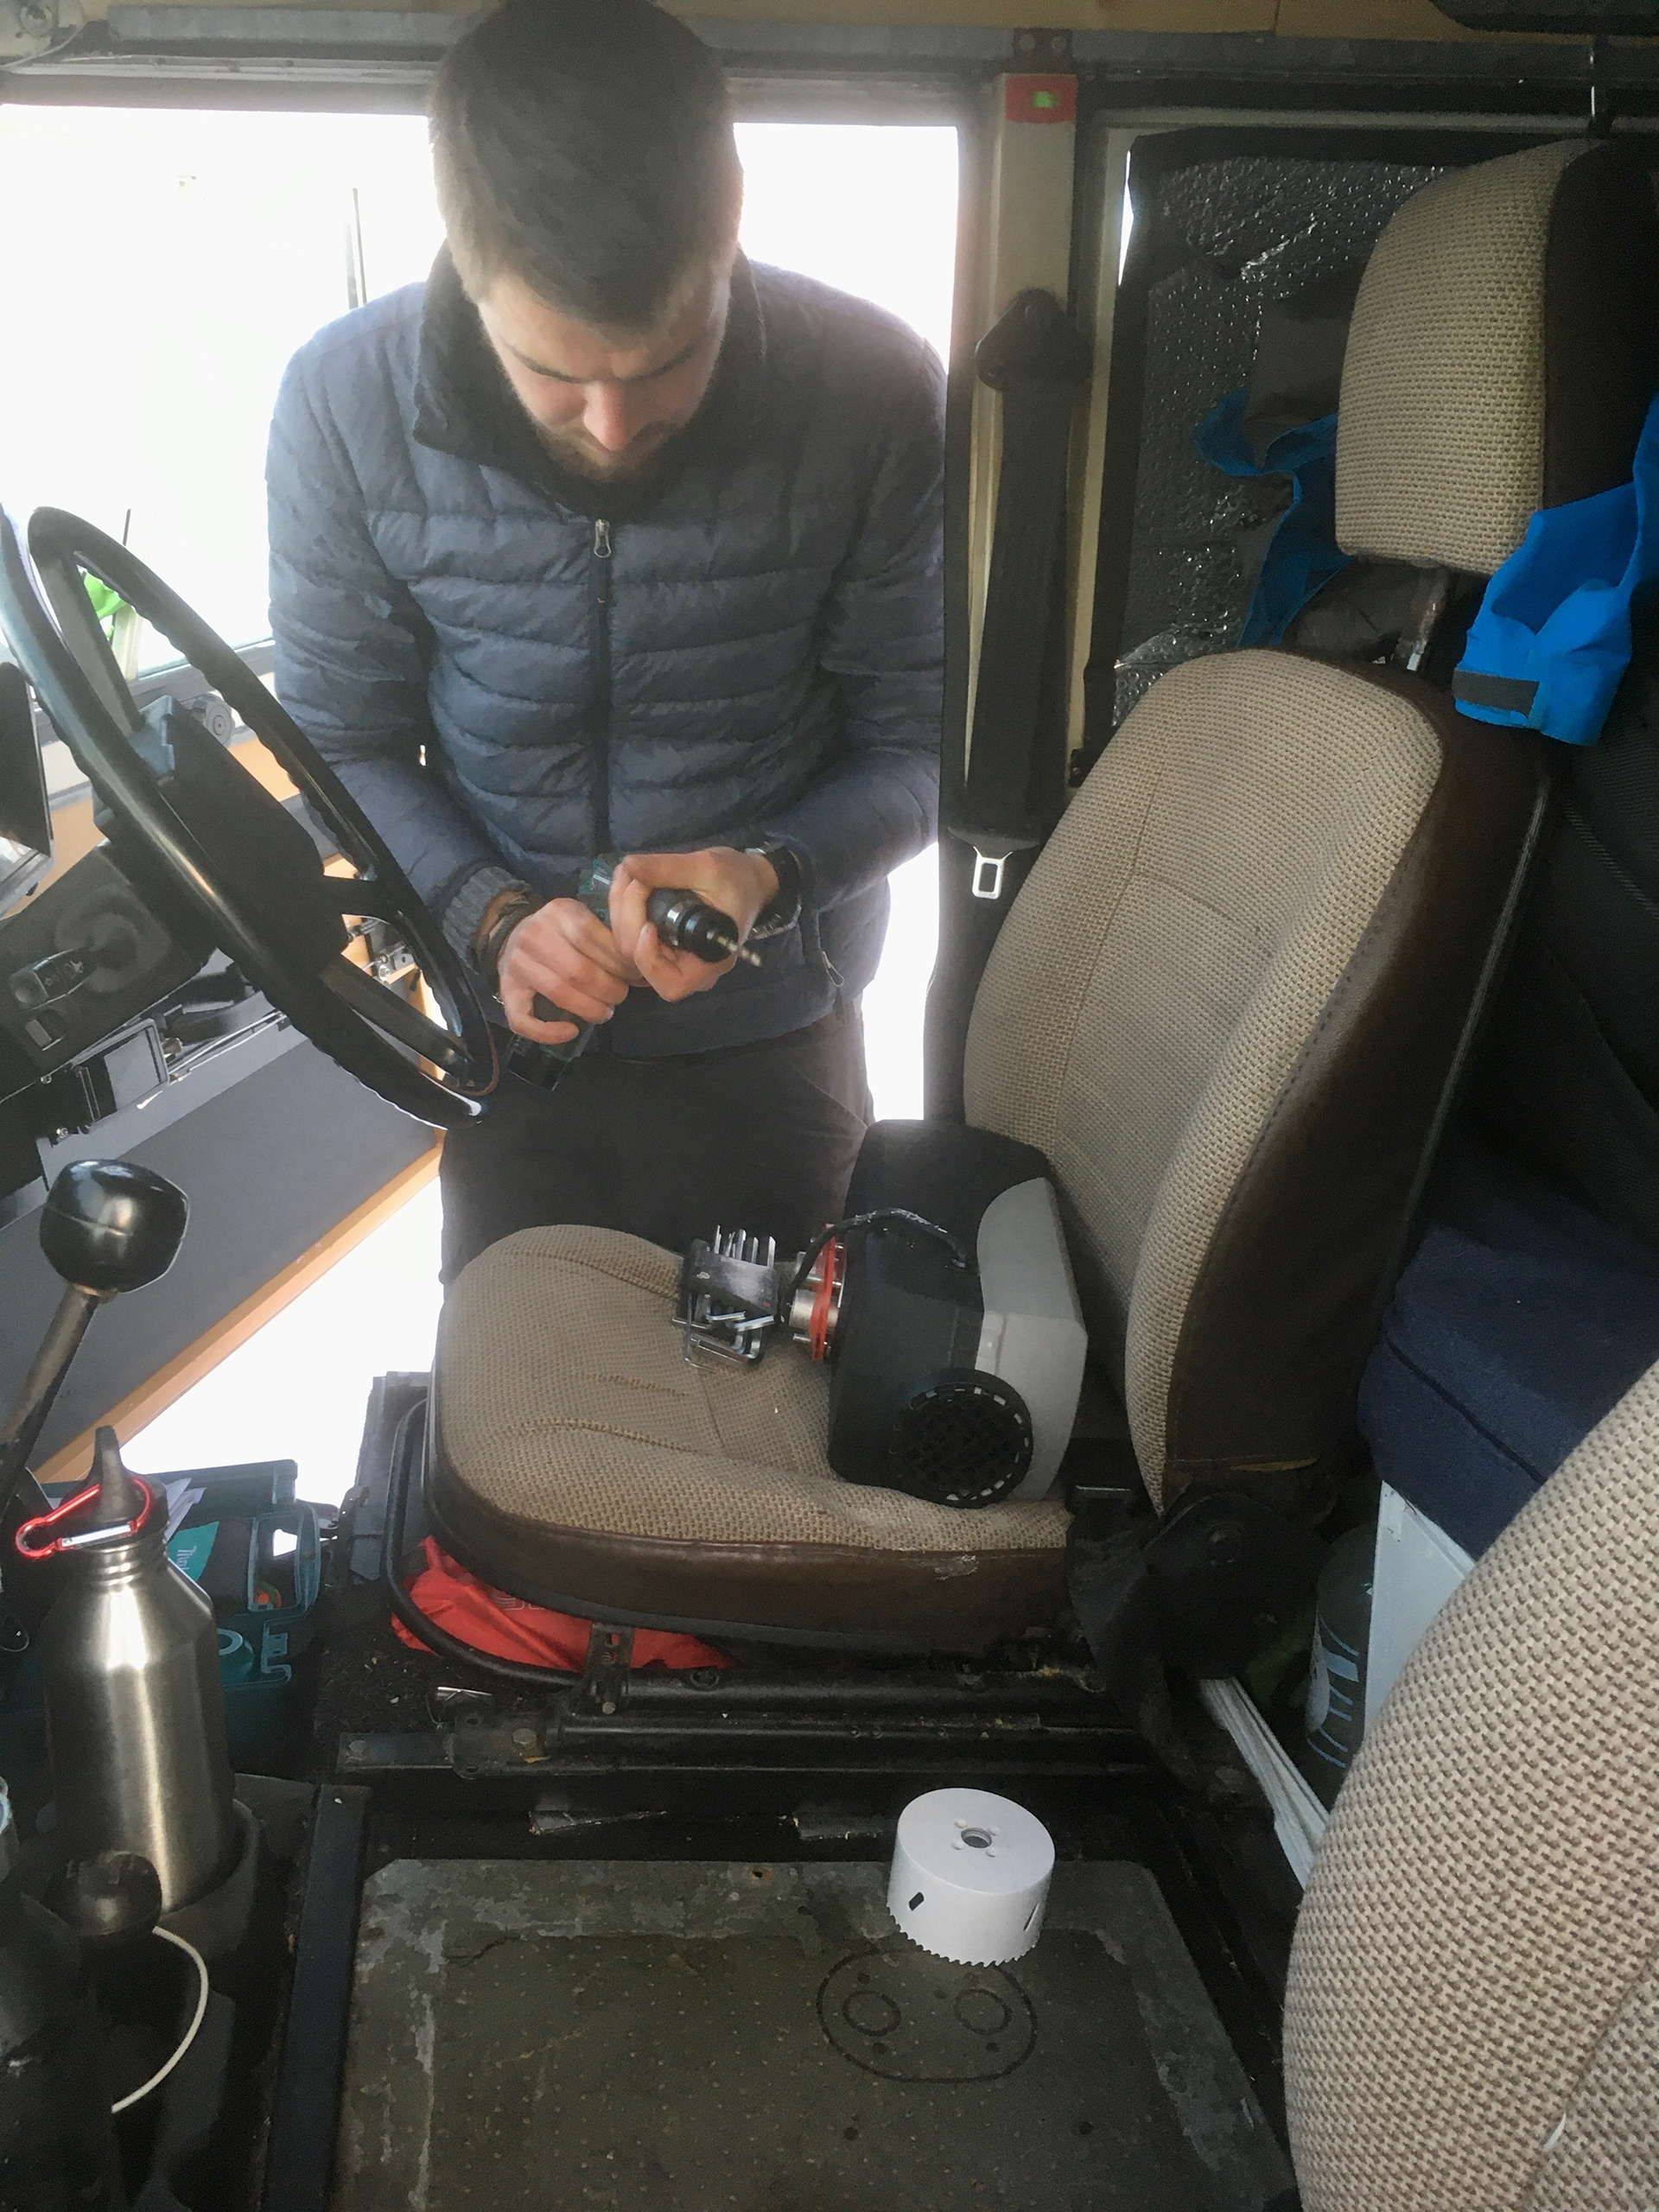
Cutting holes to install the heater
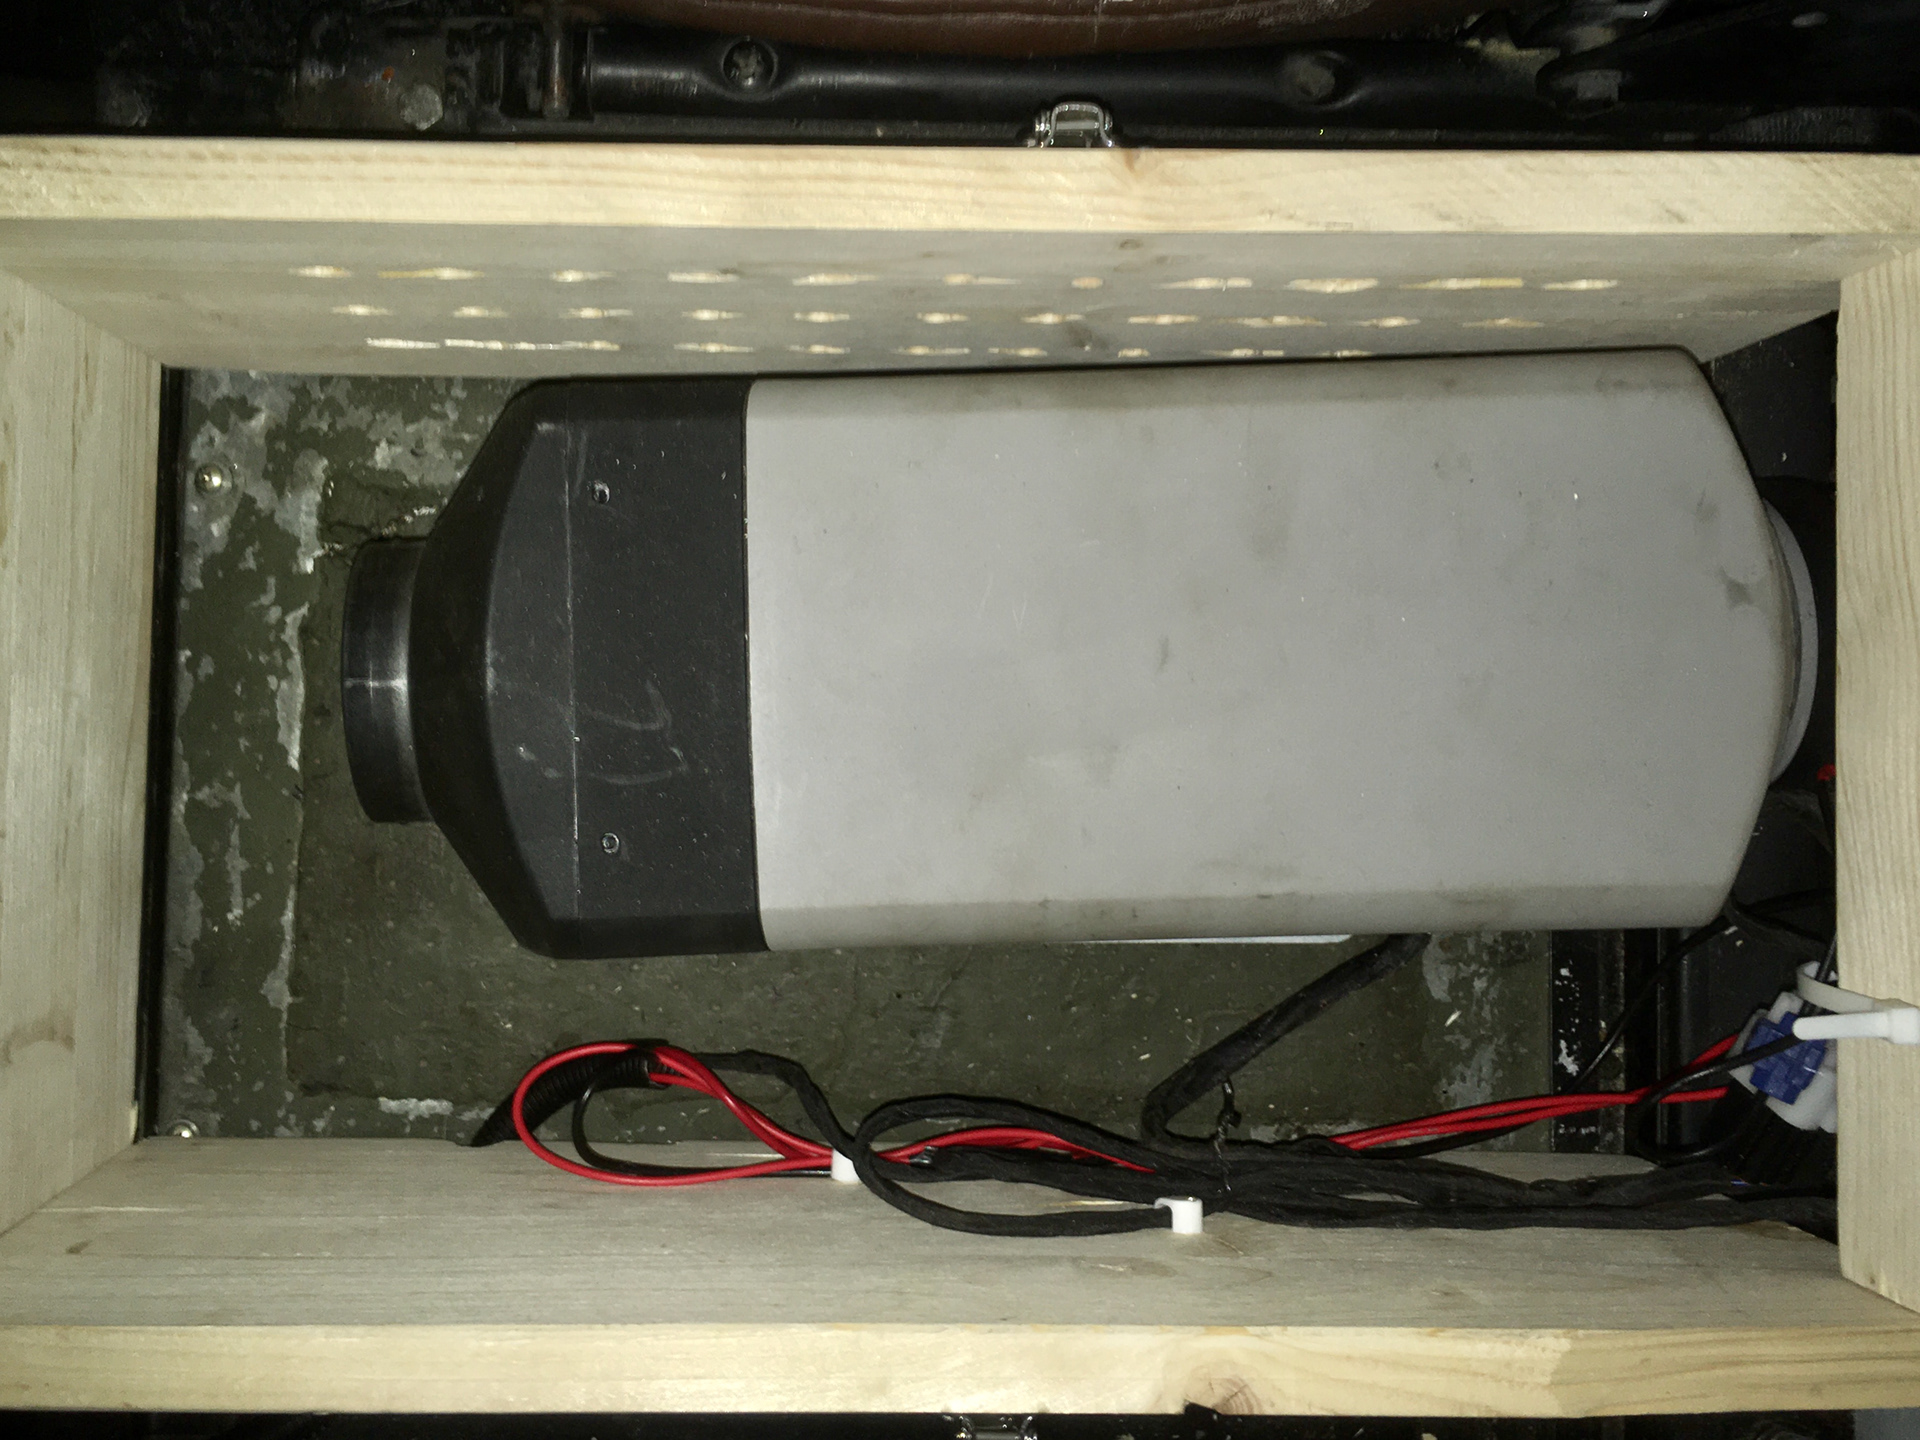
Diesel Heater unit installed under the cubby box
Fuel supply through the filler pipe
Customised filler tube with added supply to the diesel heater
Customised filler tube back in place
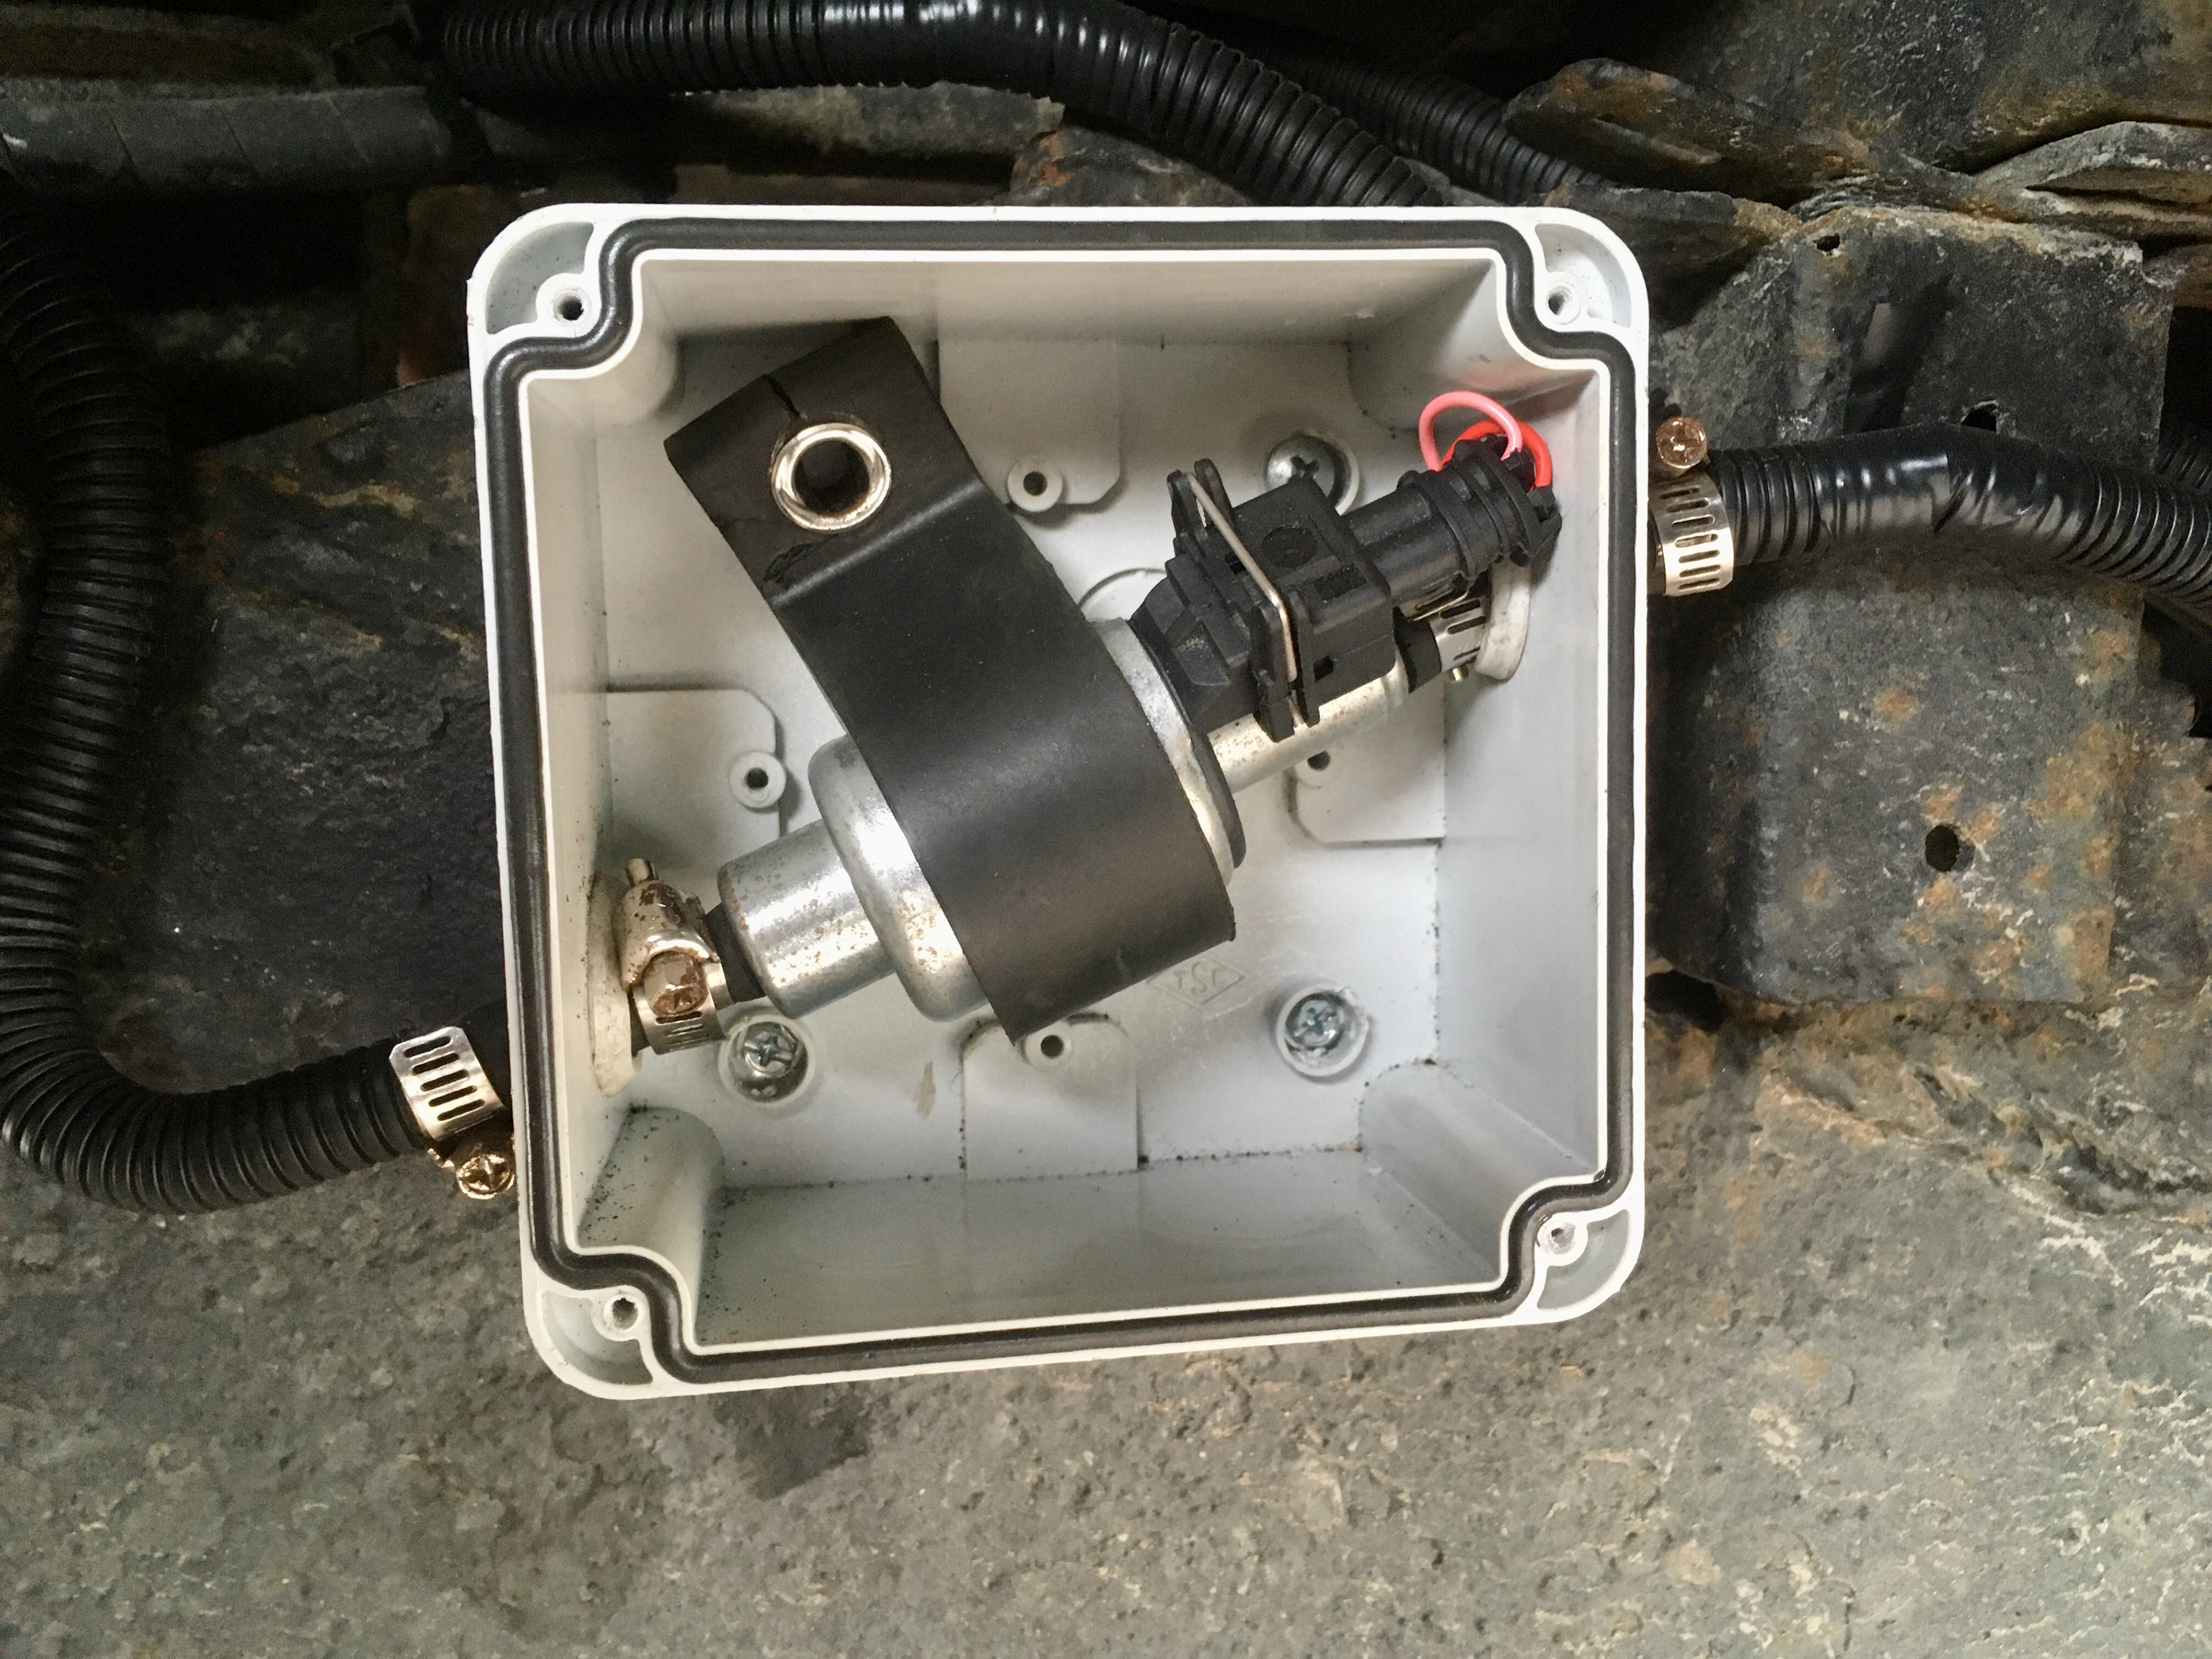
Fuel Pump installed in a waterproof box